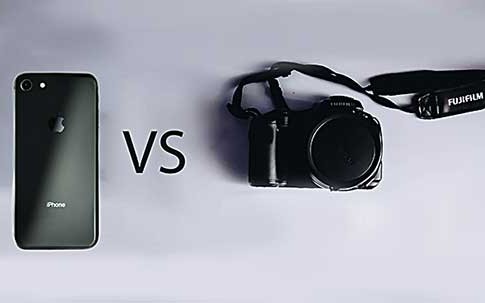
DSLR Vs Mobile Photography
We live in an age where photographs are a big part of our life. We see images and buy stuff online. We eat food but capture it before eating. In short, this is an era where our life revolves around photographs. The appearance matters, and so does the quality of your photograph. This is the time when everything is digital, and so is photography. Digital photography is new in used in every part of life. Be it online shopping, marketing, or advertisements.
E-commerce mainly depends upon product photography; if your product photo is appealing enough, voila! You score order, but if your competitor's product photo is better with better pricing, you won't get the order. The online market is not only competitive but also requires smart work and strategy. While doing product photography, one has to keep in mind that the image quality is excellent, and the image portrays the best of the product.
Now, we choose whether to use a mobile phone or a digital camera that is DSLR. There are many pros and cons of both, which include the quality of the image, post-production, and much more.
Convenience
Mobile Phone
Mobile phones are more convenient as you can take them anywhere and take photos whenever you want. You don't have to schedule a shoot particularly for it. You carry your phone everywhere, which makes it easy for you to take photos of anything, anywhere.
1. Change up your angle and perspective to get a different shot every time you take one. Use the camera in portrait mode or landscape, depending on what makes sense with whatever you're photographing-don't be afraid to experiment! Usually, taking photos from eye level is best, but it's worth getting down low if that means capturing something really interesting like unusual textures of ground coverings, dirt paths, or leaves blowing off trees.
2) Consider whether close-ups work better than wide-angled shots about how people usually hold their phones when they are going around shooting pictures (many will shoot everything at arm's length).
3) Take advantage of all those filters available on most apps; if nothing else, experimenting with these might teach you what works best for the scene at hand.
4) Send photos through apps like Instagram to see how they come out, and learn from that when you go back to take shots without filters; use the filters so that you can try different combinations of them and find out which one (or combination) works best.
5) Don't always shoot in standard mode-try variations such as HDR setting, over-exposure, focus lock camera on portrait or landscape mode.
6) Consider shooting video clips instead of just stills if your app allows it.
7) Take lots of pictures if there is something worth photographing but start with a few so that you are less likely to be frustrated or discouraged if not all photos turn out.
8) Use the HDR setting on your camera to turn out high-definition pictures. This is a feature that automatically takes three photos (one underexposed, one overexposed, and one normal exposure shot) then combines them into one perfect picture.
9) Take motion shots of things like running water and swaying plants with streaks of light or colorful reflections by holding your phone very still without pressing the shutter button.
10) Have fun! Don't think too much about all the details when just getting started-instead; concentrate on finding something beautiful or interesting and capturing it in the best way you can manage at any given moment.
You've probably heard lots of different opinions from photographers, as well as seen many images that might influence your opinion on what makes a great shot. I'm here to set the record straight and give you my top ten tips for creating the perfect photograph: These are my opinions and based on years of experience, but please feel free to disagree or add your own opinions or ideas in the comment section; below!
Pick an interesting subject:
This might seem obvious, but it's important to remember that not everything is a good candidate for photography. Don't just shoot anything and everything; pick objects that have some kind of unique quality about them-this will ensure that you end up with something more than just another snapshot.
Get close enough to fill (or nearly fill) the frame with your subject:
It can be hard to give up space on your frame for objects that you can't see, but if the point of your image is to show how big a certain rock formation is or what the sunset looks like, don't leave any gaps between the edges of your shot and your subject. This will keep viewers at least aware of its presence as they view it, even if they aren't looking directly at it.
Shoot with good timing and patience:
The timing might seem difficult at first because there is no way to know exactly when something will happen; however, practice makes perfect in this case. Be patient and wait until the right moment comes along in order to capture an object or scene exactly as you envision it-nothing less than success will do, and you'll be glad you waited.
Use a good subject-to-camera distance:
This is not the same as getting close to fill your frame with your subject, but rather having it be far enough away from the camera so that it doesn't look like a miniature model. This technique works best when taking photographs of objects in nature or other scenery and less so for portraits (which might also work better if done at arm's length).
Take advantage of available light:
Natural lighting can make all the difference in how your shots turn out, and direct sunlight is usually optimal for giving colors more life than artificial or low light sources provide. Just remember that there are rare occasions where shooting in the shade may be best, and it is always worth testing out various options.
Use manual focus:
This tip applies especially to situations when your subject is small or far away. It can also make a big difference with taking portraits; you don't want to end up with an image that's not as sharp as intended due to autofocus! It will take some experimentation (and patience) to get right for each shot, however. Just remember, practice makes perfect!
DSLR
Carrying a DSLR is not an easy task. It is not the most convenient thing. For a professional DSLR shoot, one needs to schedule a shoot and make arrangements for the shoot. If you have to take pictures of products, which will require professional photos, DSLR is perfect. But if we consider the convenience, one cannot carry DSLR everywhere, every time.
Note: This write-up makes no mention of specific camera models because it will likely be outdated by the time you read this. (For example, last year's model is almost always cheaper than this year's.) Instead, refer to review websites like DPReview.com as a reference for all features and functions.
Consumers who are considering purchasing their first SLR may wonder how to approach choosing one. There are many brands on the market today, which makes the decision even more complicated. The following tips may help those who want to travel beyond automatic settings and learn how to shoot manually with their new camera purchase, or even just those who want to learn a little more about what they're getting when they buy a new camera.
Note: There are no set-in-stone rules for manual photography with digital SLRs. You can take any photo you want whatsoever and generate the desired effect or outcome. This article is intended purely for informational purposes and is not written in the context that the writer's style is superior (e.g., "this is how it should be done").
Aperture Priority Mode
An aperture priority mode allows users to choose their aperture setting while allowing their camera program to control shutter speed. The advantages of an aperture priority mode are numerous:
1) In low light situations where there isn't much light, your camera's internal
meter will automatically set a slower shutter speed in order to allow more light into the sensor. If you are using an aperture priority mode, this is not the case. The photographer can set his or her own preferences for aperture and let the camera's meter work out the rest by choosing a shutter speed.
2) Aperture is often regarded as one of the most important settings on a DSLR; changing it allows you to change how much background is in focus when taking pictures of objects that are far away from your subject (i.e., landscape shots). This is because adjusting your f-stop (the measure which determines how big an opening in the lens actually is? commonly called "aperture") directly affects the focal length of your lens. The smaller the f-stop, the wider the opening is, and thus more light enters through it (and vice versa). Apertures can be adjusted in 1/3 increments, ranging from an aperture of F1.4 to F22 on most DSLR cameras. If you want to blur out all backgrounds or foregrounds effects when taking pictures, then use a wide aperture setting, such as f2.8 or 4.0, which will have the effect of creating images where only objects are close to your subject will remain in focus while background objects appear blurry.
The following picture was taken at ISO 100, aperture priority mode at F13. Using this setting, the aperture was set to f13, and then a shutter speed of 1/60 second was chosen by the camera (which is standard in aperture priority mode) in order to allow as much light into the camera sensor as possible. At this point, background objects are easily blurred out, making it seem like only flowers were photographed.
Background blurring
The following photo was taken at ISO 200, aperture priority mode at f9. The photographer wanted every object in focus, so he selected an aperture setting of f9, which would ensure that everything in range of his lens remained focused (i.e., foreground and background objects). This was done because most cameras will automatically select a faster shutter speed when faced with low light situations and a slower shutter speed when the amount of available light is higher.
Shutter Priority Mode
A shutter priority mode allows the photographer to choose his or her desired shutter speed while allowing their camera program to control aperture. Shutter speeds can be adjusted in 1/3 increments, with a range from 1/8000th of a second (hand-held) up to 30 seconds on most DSLR cameras. Speed settings are often referred to as 's' numbers? as in "whoever controls the s controls what you see." The longer your shutter speed is open, the more light gets into your lens and then onto your sensor? think of this as like holding an umbrella over yourself (or being inside the umbrella) to keep you dry. The faster your shutter speed is open, the less light gets into your lens and onto your sensor? think of this as like running in a rainstorm with an umbrella that is closed.
The following picture was taken at ISO 200, shutter priority mode at 1/60th of a second (standard setting). Because there was enough available light, the camera automatically chose this setting for maximum available brightness. This resulted in a well-lit shot.
Lighting Effects
The following photo was taken at ISO 200, shutter priority mode at 1/8 second (the slowest possible setting on my current DSLR). Because there wasn't enough available light available, I had to select a slower shutter speed to allow light into the camera and then onto my sensor. This resulted in an image with great lighting effects, especially on the wet cobblestone streets.
3)A typical shutter speed ranges from "1/8000s" to "30", with a range from 1/8000th of a second (hand-held) up to 30 seconds on most DSLR cameras. Longer exposures will mean that more light is collected by your camera's sensor, which allows you to take photos in darker conditions - however, it also opens up another creative possibility of allowing natural elements such as water or wind to blur your subjects.

Quality
Mobile Phone
The quality of images from a mobile phone can never be compared to that of a professional camera. Mobile phones these days provide great quality photos. The latest phones have an advanced camera to make it convenient and easy and which can provide high-quality pictures, but you can never compare these photos to the ones taken from DSLR.
DSLR
DSLR is meant to produce perfect professional photos. We cannot compare the quality of photos from DSLR to those of mobile cameras. DSLR produces high-quality photos that are perfectly appropriate for online platforms and suitable to upload on all e-commerce platforms.
Post Production
Mobile Phone
Post-production means the processing of the image, adjustments, and uploading it on the platform which is meant to be posted on. The mobile phone has many applications that can easily edit them and adjust the odds and make it fit to upload. It is easy when done with a mobile phone.
DSLR
DSLR is only used for photography. You cannot use it to adjust and edit. You will have to transfer the photos to your PC for further editing and post-production. It is not very easy and cannot be done on the go. You will have to sit properly, taking some time out for this task, to make those photos suitable for use. To edit your photos, you may easily contact a picture editing business.