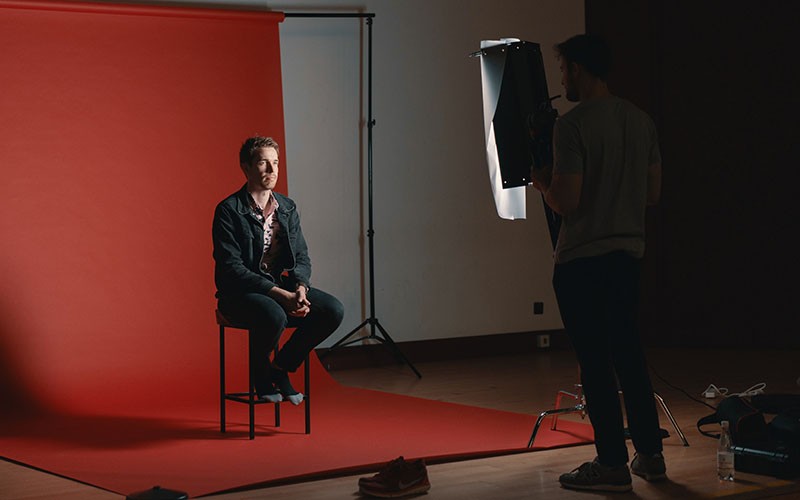
Basic photography studio setup for beginners
In this article, we will discuss the basic photography studio setup that is appropriate for beginners. This setup can be used with a digital or film camera. Some of the equipment you will need are a backdrop stand, a lightbox, a white seamless background, and some type of photo software. This basic setup will allow you to take basic photos that you can use for online portfolios or print out for use in your personal collection. You won't have any trouble putting up your own personal photography studio at home.
What is photography?
Photography is the process of capturing an image with a camera. A photographer's studio is a place where photographers can work on their projects. Home photography studios can be found in almost any home, and they are perfect for someone who wants to learn how to take great photos but doesn't have the time or space to set up a professional studio.
What is a basic photography studio setup and what do you need?
Photography is a great way to capture memories and create beautiful images. A basic photography studio setup includes a camera, lens, tripod, background, and lights. You will also need some other supplies, such as photo paper, software, and a storage medium for your photos.
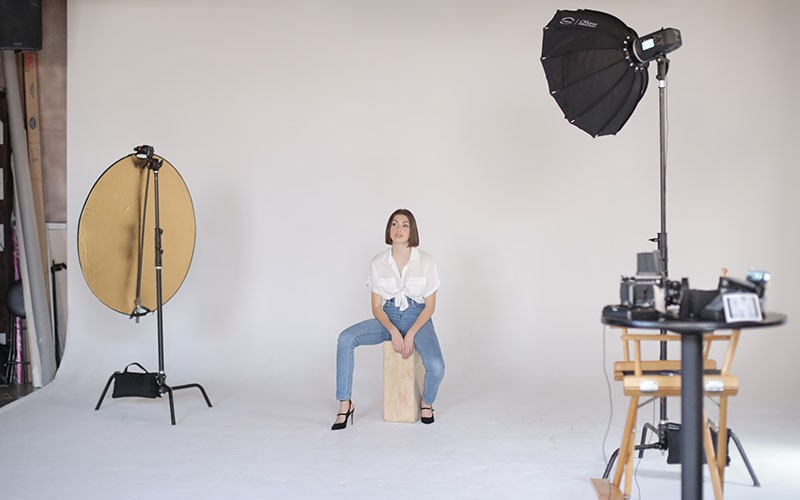
A basic photography studio setup includes the following: a light stand, a light meter, and a camera. You will also need some basic supplies, such as background material, props, and a photo printer. Here is a list of what you'll need:
1. A light stand - A STAND provides stable support for your lights while allowing you to move them around to get the best angle.
2. A light meter - This tool measures the amount of light hitting your camera sensor and tells you how much exposure to give your picture.
3. A camera - Choose the right camera for the type of photography you plan on doing. Most cameras come with built-in flashes and digital SLR cameras can take high-resolution pictures that are suitable for printing or online posting.
4. A flash - These are used to fill in shadows, especially when lighting is not available. The more powerful the flash, the better the results.
5. A camera tripod - This is a very important accessory for taking pictures of anything other than a human face.
6. A camera bag - This is a piece of cloth that you put all your equipment in when you're taking pictures.
7. A camera remote - These are used to trigger the shutter on your camera or to turn it on and off.
8. A lens - This is the part of a camera that actually takes pictures. There are many types of lenses, from wide-angle to telephoto.
9. A memory card - These are special cards used in cameras to store images after they've been taken.
10. A viewfinder - This is a little eyepiece that you look through to see what your camera sees.
Home Photography Studio Setup
Do you want to be able to take great home photos, but don't have the space or budget for a full-blown photography studio? No problem! You can create your own home photography studio using some basic supplies and a bit of creativity. Here are some tips on how to set up your own home photography studio:
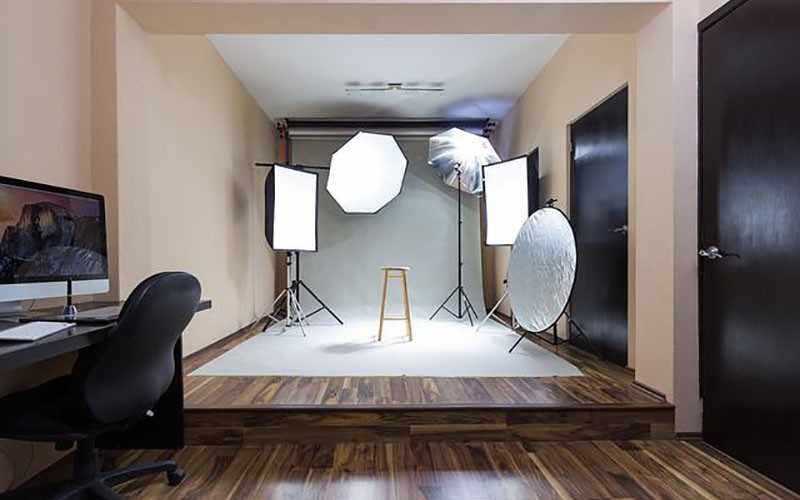
1. Choose the right space. Your studio should have enough light and ventilation to work well, but it shouldn't be too bright or hot. Try to find a place where you can comfortably sit and work.
2. Get supplies. You'll need things like photo backdrops, props, and cameras. Make sure you have enough storage for all of your supplies, as well as enough room to spread them out.
3. Plan your shots. Before you start shooting, figure out what kind of photos you want to make. Think about the kinds of shots you want to take and how you'll use them. Ask yourself what kind of photos you really want to make, and then brainstorm ideas for working toward those goals.
4. Start shooting! Once you've decided on your shots, it's time to start snapping away.
Home photography studio equipment
Home photography studio equipment can be expensive, but it's important to invest in the right items to help improve your photography skills. Here are six key pieces of home photography studio equipment you'll need:
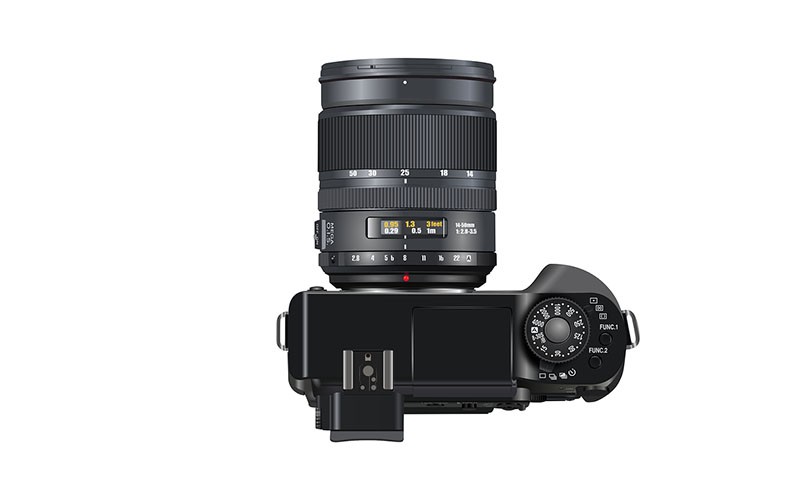
1. A good camera. A DSLR is the most common type of camera used in home studios, but a point-and-shoot or mobile phone will also work. Make sure the camera has a wide range of lenses so you can capture a variety of shots.
2. Good lighting. If you're using natural light, make sure to get a good light modifier like a flash or reflector to help your photos look their best. If you're using artificial light, make sure to get a good lighting kit that includes an adjustable light stand and bulbs.
3. A background and props.
How to set up a professional photography studio on a budget.
If you're looking to set up a professional photography studio on a budget, there are a few things to keep in mind. First and foremost, you'll need to make sure that the space you choose has enough room for both your equipment and your clients. Additionally, be sure to invest in quality gear that will last and provide quality results. Finally, make sure to have enough funding available to cover the costs of supplies and staff (if necessary). With these tips in mind, setting up your own professional photography studio can be a reality for the budget-minded photographer. If you're on a tight budget, but still want to set up a professional photography studio in your home, there are a few things you can do. First, consider using existing space in your home that you can convert into a studio. You can either find an unused room or purchase a used photography studio. If purchasing a used studio, make sure to check the condition and size of the space before making an offer. Second, consider using online photo editing services to help with the finishing touches of your photos. These services typically offer templates and guidance for taking great photos, so you won't have to worry about styling or composition. Finally, invest in some basic photography equipment such as a camera, lens, and lighting kit. With these tools in hand, you'll be able to take great shots without spending hundreds of dollars on professional photography supplies.
Equipment: What type of camera and lenses should you buy?
When deciding what type of camera and lenses to buy for your photography studio, you'll want to think about the purpose of your studio. Do you plan on primarily using your studio for home or professional photography? If you're planning on using your studio primarily for professional photography, then you'll want to invest in a more high-end camera and lens combo. On the other hand, if you only plan on using your studio for home photography, then a less expensive camera and lens may be sufficient.
Below are some factors to consider when purchasing equipment for your photography studio:
1. Purpose of Photography Studio: Home or Professional?
2. Budget: How Much You Want To Spend
3. Type of Photography You Plan On Doing Most: Portraits, Landscapes, etc.
4. Size of Studio (Length x Width)
5. Location of Studio
6. Lighting Equipment You Already Own Or Would Like To Purchase
What camera and lens combo do you plan on using for your photo studio?
Studio photography is a popular hobby for many, and with good reason. By setting up your own photo studio, you can control every aspect of the process from start to finish. However, not all photographers have the time or money to set up their own studio. That's where camera and lens combos come in handy.
Here are four camera and lens combos that are perfect for those who want to take their home photography skills to the next level:
1) A DSLR camera and a wide-angle lens will give you plenty of flexibility when it comes to taking portraits or landscape shots.
2) If you're looking for a more affordable option, consider using a point-and-shoot camera paired with a decent zoom lens. You'll still be able to capture stunning images without spending tons of money.
3) A video camera can also be a great alternative to a DSLR. While they may not offer the same quality as something like a DSLR, they are still capable of producing stunning shots.
What is the best camera setting for studio photography?
Studio photography is one of the most popular forms of photography, and for good reason. A studio setting provides a controlled environment in which photographers can capture stunning images. However, not all cameras are suitable for studio photography. Here are the best camera settings for studio photography:
1) Use a tripod to stabilize your camera. A stable platform will reduce the chance of camera shake and improve your images.
2) Set your ISO to 100 or lower to achieve a consistent shutter speed. This will minimize noise and improve the clarity of your photos.
3) Use a large aperture to create depth of field and blur background elements. This will add focus and drama to your photos.
4) Shoot in RAW format to capture more detail than you would with JPEGs. RAW files allow you to edit them later on if needed, which can give you more control over the final product.
Lighting: How should you light your subject?
There is no one answer to this question as the best way to light your subject will depend on the type of photography you are doing and your own personal preferences. However, some basics that should always be considered when lighting a subject include:
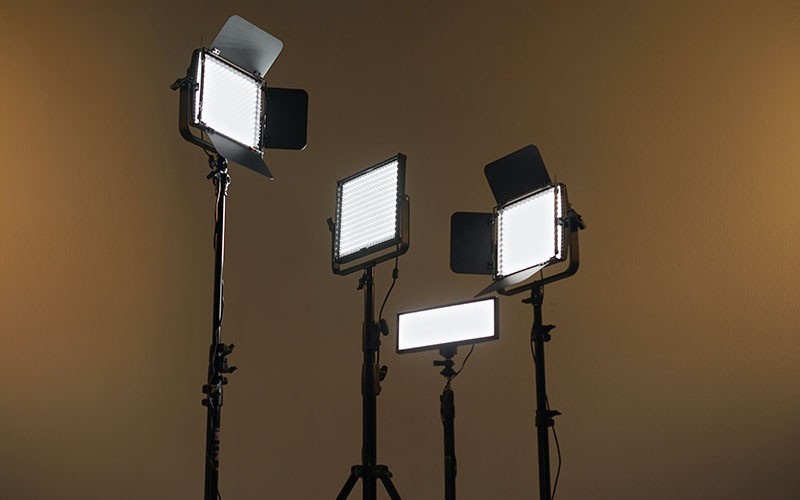
-The type of light you are using. This includes natural or artificial light.
-Where the light is coming from. This includes the direction of the sun, windows, artificial lights, and lamps.
-The size and shape of your subject. This includes whether it is a person or an object.
-The angle at which you are shooting your subject. This includes whether it is straight on or if you are shooting from a different angle.
How many lights do I need for studio photography?
Starting out as a home photographer, you may be wondering how many lights I need for studio photography. The answer, of course, depends on your specific needs and goals as a photographer. However, here are some general guidelines to help you get started:
If you are primarily shooting stills or video, then anywhere from one light to three lights will suffice. If you plan on using your studio for more creative endeavors such as product or fashion photography, then four or five lights will likely be necessary. Remember to account for shadows and highlights when calculating how many lights are necessary.
Natural light: The use of natural light is highly recommended for your photography.
Keep in mind that the number of lights you need does not have to be expensive. You can get started with one small light kit or even use natural light if your environment is conducive to it. Just make sure that whatever setup you choose is sturdy and can withstand regular use.
How do you build a home studio light?
Building a home photography studio light can be a daunting task for the novice photographer. There are so many options and configurations to choose from, and it can be hard to know where to start. In this article, we will discuss some of the key factors you should consider when building your home studio light. First and foremost, you need to decide what type of light you want to use in your studio. There are three main types of light: natural lighting, artificial lighting, and strobe lighting. Natural lighting is the most common type of light in professional photography studios. It comes from the sun, stars, and other natural sources like lamps or windows. Although natural light is usually very good for photography, it can also be unpredictable and too bright at times. Artificial lighting is used mostly in photography studios that require more controlled shadows or highlights than natural light can provide.
Strobe Lights: Strobe lights are one of the most popular lighting tools used in photography. They can add an extra level of excitement and energy to your photos, making them stand out from the crowd.
Backgrounds: Where can you find affordable backdrops?
There are many places to find affordable backdrops for photography studio use. Many online retailers offer a wide variety of backdrops at different price points for a home photography studio. The best way to determine what type of backdrop is right for you is to explore several different retailers and compare prices. You can also search for specific types of backdrops, such as white or black backgrounds if you want a specific look. Some photographers prefer natural wood backgrounds while others prefer synthetic materials. You can also get a vinyl background if you desire more durable photography backdrops. No matter the choice, you're sure to find the right one for your home photo studio. The backdrop is the very essential part of your own photography studio. You will find many backdrops on Amazon for your studio space.
Display your photography backdrops, floors, and floor drops using durable support equipment and accessories.
What are the many types of camera lens filters, and why are they necessary?
There are many types of camera lens filters, and they are necessary for a variety of reasons. Some filters can help to improve the quality of your photographs, while others can protect your camera lens from dirt and damage. Filters can also enhance the colors of your photographs, or create special effects. Whether you're a professional photographer who uses studio settings regularly, or you simply enjoy taking photos at home, it's important to understand the different types of camera lens filters available and why they're necessary.
UV filters: One of the most basic types of camera lens filters is a UV filter. These filters help to protect your camera from harmful UV rays that can cause your photographs to fade and degrade over time. UV filters are often used for indoor photography, but they're also useful for taking pictures in the outdoors. If you're shooting under a bright sun, or if you're using your camera near water, a UV filter will protect your camera from damage.
Neutral Density filters or ND filters: Neutral density filters are a great way to control the amount of light that enters your camera. They're also great for controlling the exposure of your photographs, making it possible to create intentionally under or over-exposed photos. In a studio setting, neutral density filters can be used to darken or brighten a scene, while in a home setting they can be used to adjust the exposure of individual shots without affecting the overall composition.
Polarizing filters: Polarizing filters are a popular tool for studio photography. They can help to remove unwanted reflections, and can also be used to create a variety of effects. Some photographers use polarizing filters to enhance the contrast and color in their images.
Color filters: Color filters are a key tool in photography studio settings. They can be used to change the color of the light hitting a subject, which can create different effects on the photograph. There are many types of color filters, and each has its own advantages and disadvantages.
Some common uses for color filters are in portrait photography to add warmth or coolness to a person's face, in landscape photography to change the colors of sky and water, and in fashion photography to give clothing a specific look. It's important to choose the right filter for the situation since overuse of a certain filter can result in unwanted looking effects. Photographers also use color filters in-home photography settings to add atmosphere and mood to their photos. For example, using a yellow filter can make a room look cheerful and happy while adding blue shadows will create an eerie effect.
How to decorate your photo studio: What works well and what doesn't?
Decorating your photo studio can be a daunting task, but there are many different ideas that have worked for others. Some people prefer more traditional studio décor such as wide wooden floors and large, heavy furniture. Others prefer to keep their studio light and airy with white walls and bright colors. Whatever your personal style, following some basic guidelines will help you create a space that is both functional and visually appealing.
1. Start with the basics - a sturdy work surface and good lighting are essential for any photographer. Make sure the surface is level and large enough to accommodate your equipment, plus add a few extra inches so you have room to move around. Good lighting will make all the difference in creating flattering portraits or working on wedding photos.
2. Create a well-organized work area - If you don't already have a well-organized studio, invest in one that is both functional and attractive. I like to keep my studio organized by keeping folders for each client and their specific needs.
3. Gather all the equipment you'll need - You'll need to gather all your vital equipment and make sure it's easy to grab and move around - especially in the event of a power outage.
4. Decide on a studio style - There are many different styles of studios, and each has its own advantages. Your choice will be based largely on what you like and what you're comfortable with.
5. Plan your space - Decide what will be visible from the street and what you want to hide. Decide on a location for your door, windows, and access to the restrooms. Be sure to add some storage space so that you can easily store all of your supplies.
Setting up your studio: Prepare your workspace and equipment
If you are serious about photography, then setting up your own studio is a must. There are many factors to consider before getting started, such as equipment needs, space requirements, and workflow considerations. This article will outline some key steps you should take to prepare for your studio setup. To get the most out of your photography sessions, it is important to have a well-organized workspace. Clear surfaces that can be easily covered with props or backdrops help to reduce clutter and make it easier to move around equipment. Begin by clearing any large furniture from the area and creating a basic layout for your studio using tables and chairs. Decide on the size of your space and buy or borrow what you need to fit the bill. When selecting photography equipment, remember that quality over quantity is always advised.
Specialized Equipment for Portrait, Newborn, Still Life, and Product Photography
Studio photography is a popular form of photography that many people enjoy. There are many different types of studio photography that can be done, including portrait, newborn, still life, and product photography. Each type of photography requires different specialized equipment that can make the process easier or more difficult. Portrait photographers often use studio lights to help create flattering light for their subjects. Newborn photographers need to consider the baby's position in order to capture their best shots. Still, life photographers often use props to create interesting compositions, while product photographers need to use equipment such as tripods and lenses to get the perfect shot of a product. A good home photography studio will have all the necessary equipment for each type of photographer and will make the process easier and more fun.
Tips for shooting great photos: From posing to lighting, here are some expert tips.
1. When it comes to photography, there are a few key tips you can use to take great photos every time. Posing is one of the most important factors, and by following these tips you'll be able to produce stunning shots with little effort. Preparation is key when shooting in a photography studio. Here are some tips to help you get started:
2. One of the simplest ways to improve your posing skills is to practice in front of a mirror or other reflective surface. This will help you get used to positioning yourself in various scenarios and learn how to adjust your body accordingly.
3. Using natural light is another important factor when shooting photos indoors or outdoors. By using sunlight, moonlight, or artificial lighting, you'll be able to create a variety of different looks that will suit any photo project.
4. Always pay attention to your lighting sources and adjust your settings accordingly.
5. Choose what to shoot and how to shoot it.
6. Create a plan of attack for your studio sessions based on the subject matter you want to photograph.
7. Get organized and create a system for storing your photos so they're easy to find and use.
8. Make sure your studio is set up properly with the right lighting, backgrounds, props, and more.
9. Practice makes perfect - be patient while shooting in the studio and always try different things until you find what works best for you.
10. Stay motivated and enjoy the process - taking pictures in the studio can be fun if you approach it that way!
Shooting techniques: Basic composition, exposure, and lighting techniques.
The art of photography is a craft that requires both technical proficiency and artistic ability. The basic concepts of composition, exposure, and lighting are essential for any photographer, regardless of the setting or subject matter. In this article, we'll discuss these topics in more detail, and provide tips for improving your photography skills. Composition is the arranging of elements within a photograph to create a pleasing image. When taking pictures in a studio setting, it's important to consider the layout of the space and plan your shots accordingly. You should also be mindful of how light affects your subjects - using proper Exposure and Lighting techniques can make all the difference in terms of creating striking images. Exposure is the amount of lightness or darkness exposed on an image sensor during digital photo capture.
Post Processing: How do you make your photos look good?
A good photograph is one that has been well-processed. This means that the photo has been edited, enhanced, and/or corrected in some way. There are many image editing companies that edit photos at a cheap price. There are many different ways to post-process a photo, and each will give it a unique look. Here are some popular post-processing techniques:
Editing: This is probably the most common technique used to improve photos. By adjusting levels, brightness, contrast, etc., an editor can help to bring out details or correct mistakes in the photo.
Enhancing: Sometimes called "retouching," this involves removing blemishes or correcting color problems. This can be done with software like Photoshop or GIMP, or with more basic tools like healing brush strokes or sandpaper textures.
Correcting: Photos can also be corrected for things like exposure and lens distortion.
Outsource photo editing for post-production
In today's digital world, it is more common than ever for people to take their photos with their smartphones or digital cameras. However, when it comes to post-production work - editing and enhancing images - many people still turn to a photography studio. There are a number of reasons for this: most photography studios have staff with years of experience in post-production, they have the equipment and software necessary to complete the task well, and they typically offer competitive rates.
However, there are some occasions when a photographer might want to outsource photo editing work. This might be because they don't have the time or expertise to do it themselves, they want someone else to take care of the process so that they can focus on other aspects of their business, or they simply don't have the space or equipment necessary for post-production work.
In conclusion, this basic photography studio setup is perfect for beginners who want to start taking photos with their phones, or for anyone who wants a simple and affordable way to improve their photography skills. This setup includes a tripod, phone stand, camera, and photo editor app. All you need are some basic materials and you're ready to start capturing memories of your loved ones and friends!
